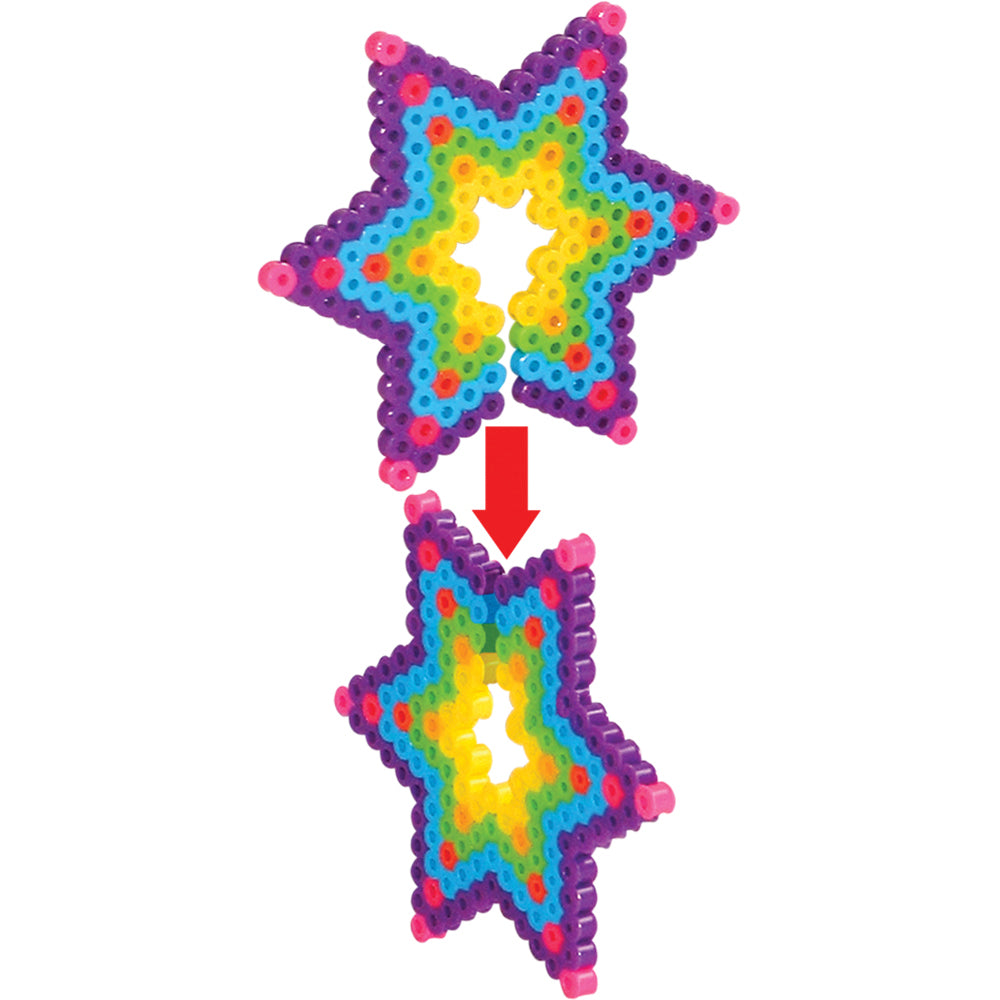
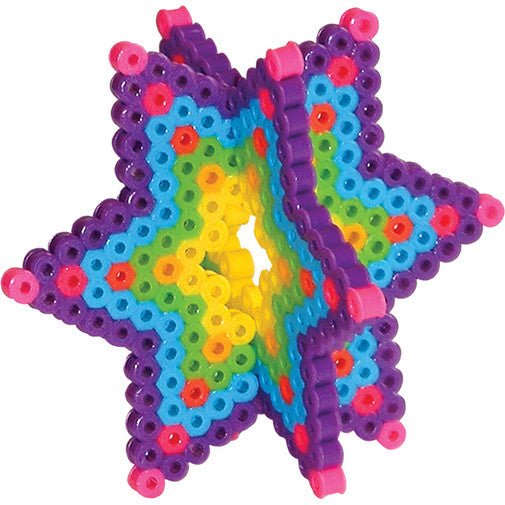
3D Star

3D Star

This 3D star is so fun and easy, you'll want to make more than one! Thread a thin fishing line through one of the beads to hang it in a window, or hang a whole bunch from the ceiling for a starry night. You can even change up the colors to make Christmas ornaments!

1 of 4

Instructions

Step 1
Bead Colors Needed:
Magenta - 12
Raspberry - 12
Hot Coral - 12
Cheddar - 12
Yellow - 34
Kiwi Lime - 58
Light Blue - 82
Purple - 106
See the Supply List for beads and tools you can purchase.

Step 2
Download the PDF for the 3D Star Project Pattern. You will use the small star pegboard to create your project. If you are using a clear pegboard, slide the actual-size pattern underneath it. Place your beads following the pattern.

Step 3
Ask an adult to fuse your designs. Place your pegboard on a flat, heat-safe surface. Set a household iron to the medium setting. Place ironing paper over the pegboard. In a circular motion, begin to iron the project. When ironed properly, the beads will still have open centers. DO NOT OVER-IRON as this will cause the beads to close and can make assembly of your project more challenging. Let the design cool.

Step 4
Remove the paper and bead design from the pegboard. Flip the design over to expose the non-fused side. Repeat step two. Let cool completely. Once the design is cool, peel off the ironing paper. Your pegboards and ironing paper are reusable.

Note: Beads need heat for about 10-20 seconds per side to fuse evenly. Lift the paper occasionally to see how the beads are fusing. Additional heating time may be required.

Step 5
ASSEMBLY: To assemble, hold the stars at right angles to each other, align the slots, and slide together.