Thanksgiving Food Magnets

Thanksgiving Food Magnets

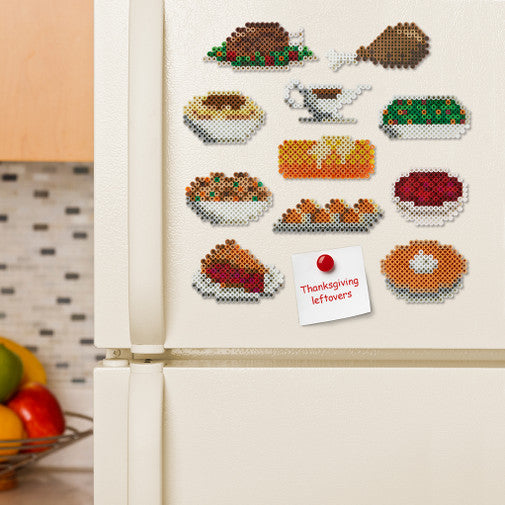
Use these fun food magnets on the fridge to indicate what's left of the Thanksgiving Feast—turkey, stuffing, pie, and more! Designed by Kyle McCoy.

1 of 4

Instructions

Step 1
BEAD COLORS NEEDED:
Raspberry - 12
Red - 47
Rust - 7
Cranapple - 74
Butterscotch - 229
Orange - 38
Crme - 85
Pastel Yellow - 13
Yellow - 35
Green - 34
Dark Green - 68
Evergreen - 5
Tan - 101
Light Brown - 192
Brown - 84
Light Grey - 174
Grey - 107
White - 309

YOU WILL ALSO NEED:
Large square pegboard
Iron and ironing paper
Tweezers
Magnets
Glue gun
See the Supply List for beads and tools you can purchase.

Step 2
CREATING THE DESIGN:
Download the PDF for the Thanksgiving Food Magnets Project Pattern. If you are using a clear pegboard, slide the actual-size pattern underneath it. Place your beads as shown.

Step 3
FUSING THE DESIGN: An adult should do this step.
Place your pegboard on a flat, heat-safe surface. Set a household iron to the medium setting. Place ironing paper over the pegboard. In a circular motion, begin to iron the project. When ironed properly, the beads will still have open centers. NOTE: Beads need heat for about 10-20 seconds per side to fuse evenly, it is possible some colors may need a little more time. Let the design cool.

Remove the paper and bead design from the pegboard. Flip the design over to expose the non-fused side. Repeat the fusing. Let cool completely. When the design is cool, peel off the ironing paper. Your pegboards and ironing paper are reusable.

Step 4
ASSEMBLY:
Glue a magnet to the back of each piece.