Step 1
Bead Colors Needed:
Hot Coral - 32
Raspberry - 15
Cranapple - 5
Orange - 69
Cheddar - 39
Creme - 120
Yellow - 66
Prickly Pear - 26
Kiwi Lime - 16
Light Green - 24
Parrot Green - 165
Dark Green - 356
Pearl Light Blue - 30
Toothpaste - 26
Turquoise - 13
Dark Blue - 87
Blueberry Cream - 34
Periwinkle Blue - 173
Plum - 14
Purple - 48
Rust - 6
Brown - 307
Pearl Silver - 334
Grey - 1241 - 2 bags
Dark Grey - 1169 - 2 bags
Black - 1246 - 2 bags
White - 6
Raspberry Pearl Stripe - 20
Fire Stripe - 36
Gold Pearl Stripe - 40
Prickly Pear Pearl Stripe - 50
Cucumber Stripe - 404
Starry Nite Stripe - 500
Royal Blue Pearl Stripe - 37
Grape Stripe - 32
Monkey Stripe - 602
Silver Pearl Stripe - 35
Zebra Stripe - 49
See the Supply List for beads and tools you can purchase.
You will also need:
Scissors
Clear tape
Step 2
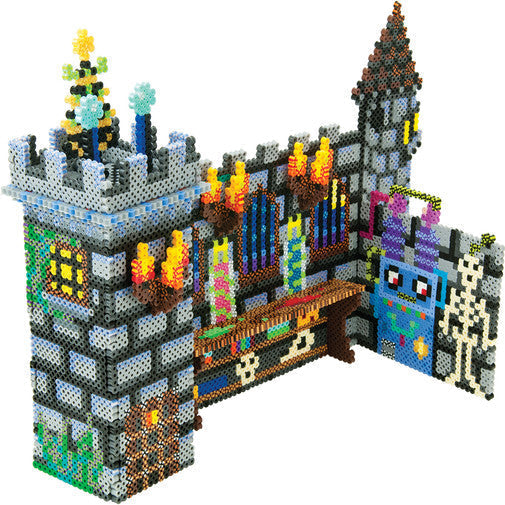
Download the PDF for the Creepy Lab Project Pattern. You will need 6 large square pegboardsŃsome of the patterns require multiple pegboards assembled together as shown in the project sheet. Cut these patterns out and tape together in the same way. If you are using clear pegboards, slide the actual-size patterns underneath them. Place your beads on the pegboards as shown.
Step 3
Ask an adult to fuse your designs. Place your pegboard on a flat, heat-safe surface. Set a household iron to the medium setting. Place ironing paper over the pegboard. In a circular motion, begin to iron the project. When ironed properly, the beads will still have open centers. DO NOT OVER-IRON as this will cause the beads to close and can make assembly of your project more challenging. Let the design cool.
Step 4
Remove the paper and bead design from the pegboard. Flip the design over to expose the non-fused side. Repeat step two. Let cool completely. Once the design is cool, peel off the ironing paper. Your pegboards and ironing paper are reusable.
Note: Beads need heat for about 10-20 seconds per side to fuse evenly. Lift the paper occasionally to see how the beads are fusing. Additional heating time may be required.
Step 5
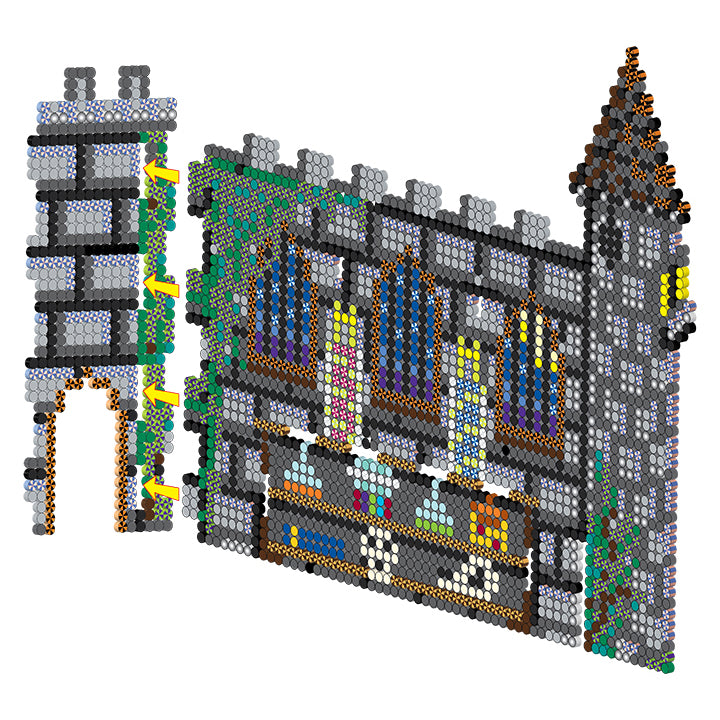
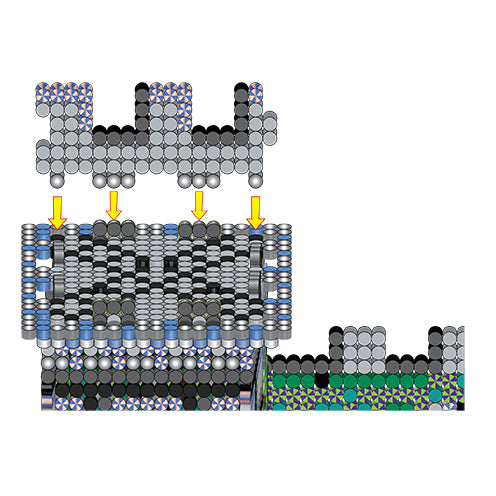
ASSEMBLY: Back Wall/Tower: Insert the notched ends of the back wall through the slots of the tower piece C. Make sure the walls are perpendicular and touch.
Step 6
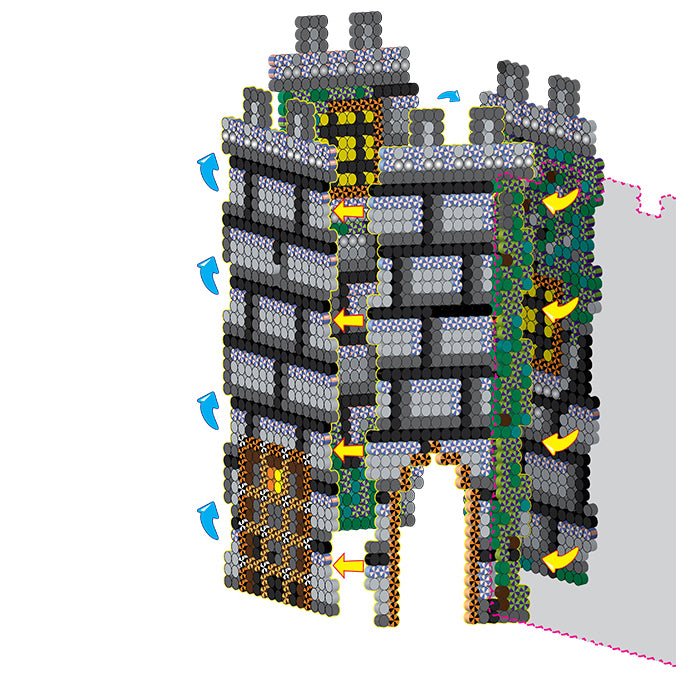
Connect the tower pieces A, B, and D with tower piece C to complete the tower.
Step 7
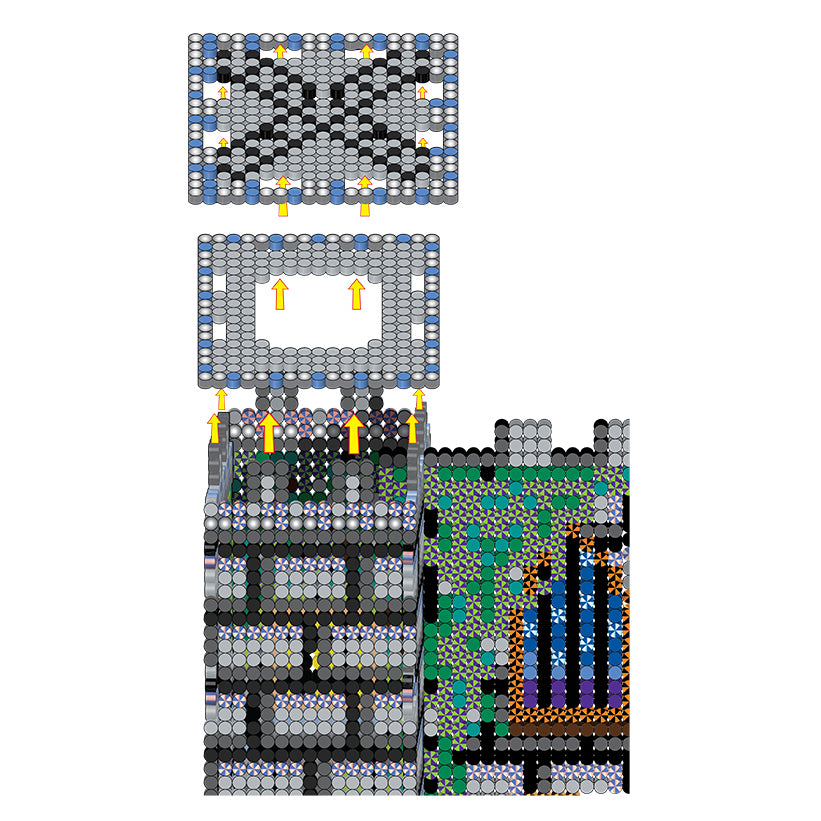
Tower: Insert the tower Base 1 over the tabs of the assembled tower walls, pushing down completely until 2 rows of beads come through the slots. Insert tower Base 2 over the tabs in the same way until 1 row of beads comes through the slots. This will help support the tower.
Step 8
Insert the tabs of turret piece D through the slots along the back of the tower.
Step 9
Insert the tabs of turrets B and C through the slots as with piece D, connecting the sides with piece D. Insert the Power Generator pieces in the slots of Tower Base 2.
Step 10
Insert turret A to complete the tower.
Step 11
Torches and Lab Table: Create the Torches by inserting the double candelabras into the slots of the single ones. Insert the tabs of the legs into the bottom of the Table.
Step 12
Final Assembly: Slide the Crossing Wall through the slot of the Back Wall to complete your Creepy Lab. Insert the tabs of the Lab Table into the slots of the Back Wall. Add two of the Torches in the same way above the table. The third Torch is placed through the opening in the Tower.