Step 1
Bead Colors Needed:
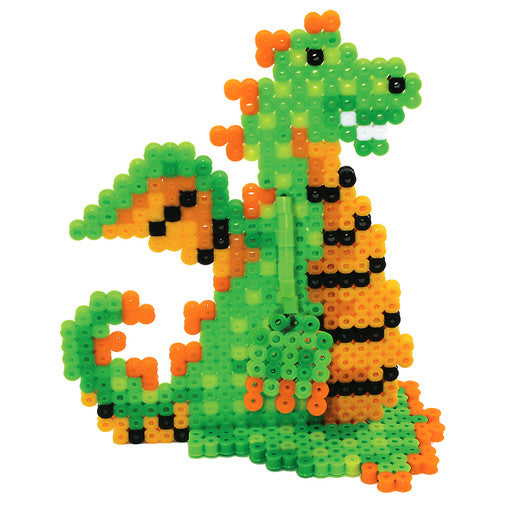
Orange - 53
Butterscotch - 43
Cheddar - 37
Prickly Pear - 49
Kiwi Lime - 216
Green - 117
Black - 37
White - 3
See the Supply List for beads and tools you can purchase.
You will also need:
Plastic string
Step 2
Download the PDF for the Friendly Dragon Project Pattern. You will use the large square pegboard to create your project. If you are using a clear pegboard, slide the actual-size pattern underneath it. Place your beads following the pattern.
Step 3
Ask an adult to fuse your designs. Place your pegboard on a flat, heat-safe surface. Set a household iron to the medium setting. Place ironing paper over the pegboard. In a circular motion, begin to iron the project. When ironed properly, the beads will still have open centers. DO NOT OVER-IRON as this will cause the beads to close and can make assembly of your project more challenging. Let the design cool.
Step 4
Remove the paper and bead design from the pegboard. Flip the design over to expose the non-fused side. Repeat the fusing. Let cool completely. Once the design is cool, peel off the ironing paper. Your pegboards and ironing paper are reusable.
Note: Beads need heat for about 10-20 seconds per side to fuse evenly. Lift the paper occasionally to see how the beads are fusing. Additional heating time may be required.
Step 5
ASSEMBLY: Cut a 7 inch length of plastic string. Tie the end of the string to one of the hands. Thread 7 green beads onto the string. Thread the string through the body of the dragon as shown. Thread 7 more green beads onto the string and finish by tying on the other hand.
Step 6
To stand your dragon, insert the body of the dragon into the feet as shown.