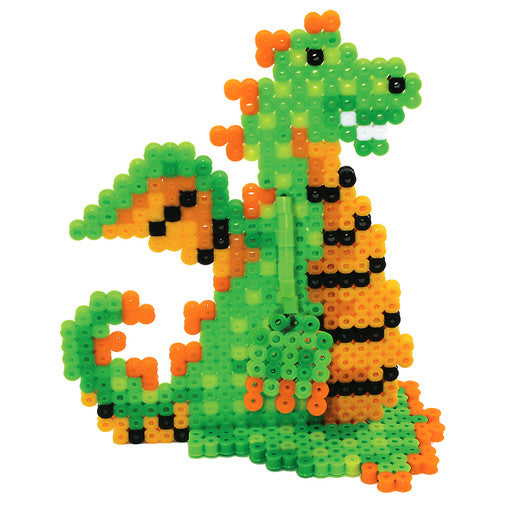
Friendly Dragon

Friendly Dragon

This cute baby dragon is trying his best to puff out his fire breath, but he's just not too terrifying quite yet! With easy 3D assembly, you can even change the colors and create a sister for him!

1 of 4

Instructions

Step 1
Bead Colors Needed:
Orange - 53
Butterscotch - 43
Cheddar - 37
Prickly Pear - 49
Kiwi Lime - 216
Green - 117
Black - 37
White - 3
See the Supply List for beads and tools you can purchase.

You will also need:
Plastic string

Step 2
Download the PDF for the Friendly Dragon Project Pattern. You will use the large square pegboard to create your project. If you are using a clear pegboard, slide the actual-size pattern underneath it. Place your beads following the pattern.

Step 3
Ask an adult to fuse your designs. Place your pegboard on a flat, heat-safe surface. Set a household iron to the medium setting. Place ironing paper over the pegboard. In a circular motion, begin to iron the project. When ironed properly, the beads will still have open centers. DO NOT OVER-IRON as this will cause the beads to close and can make assembly of your project more challenging. Let the design cool.

Step 4
Remove the paper and bead design from the pegboard. Flip the design over to expose the non-fused side. Repeat the fusing. Let cool completely. Once the design is cool, peel off the ironing paper. Your pegboards and ironing paper are reusable.

Note: Beads need heat for about 10-20 seconds per side to fuse evenly. Lift the paper occasionally to see how the beads are fusing. Additional heating time may be required.

Step 5
ASSEMBLY: Cut a 7 inch length of plastic string. Tie the end of the string to one of the hands. Thread 7 green beads onto the string. Thread the string through the body of the dragon as shown. Thread 7 more green beads onto the string and finish by tying on the other hand.

Step 6
To stand your dragon, insert the body of the dragon into the feet as shown.