Step 1
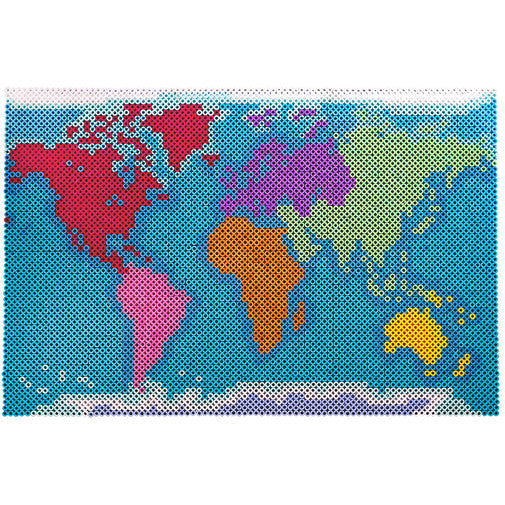
Bead Colors Needed:
Bubblegum - 145
Raspberry - 394
Orange - 222
Yellow - 89
Pastel Green - 455
Toothpaste - 309
Turquoise - 1834
Light Blue - 769
Blueberry Cream - 132
Plum - 213
White - 301
Sky Blue Stripe - 183
See the Supply List for beads and tools you can purchase.
You will also need:
Heavy cardboard or foam core for mounting
Quick-drying adhesive
Long pins for labeling
Scissors
Clear tape
Step 2
Download the PDF for the Map of the Continents Project Pattern. You will use 6 large square pegboards for your project. If you are using clear pegboards, slide the actual-size patterns underneath them. Place your beads on the pegboards following the pattern.
Step 3
Ask an adult to fuse your designs. Place your pegboard on a flat, heat-safe surface. Set a household iron to the medium setting. Place ironing paper over the pegboard. In a circular motion, begin to iron the project. When ironed properly, the beads will still have open centers. Let the design cool.
Step 4
Remove the paper and bead design from the pegboard. Flip the design over to expose the non-fused side. Repeat the fusing. Let cool completely. Once the design is cool, peel off the ironing paper. Your pegboards and ironing paper are reusable.
Note: Beads need heat for about 10-20 seconds per side to fuse evenly. Lift the paper occasionally to see how the beads are fusing. Additional heating time may be required.
Step 5
ASSEMBLY: Mount your finished design to heavy cardboard or foam core with a quick-drying adhesive. Use pins to mark the places you have visited or to track world events.